One Line Puzzle Level 5 — Leave a way back
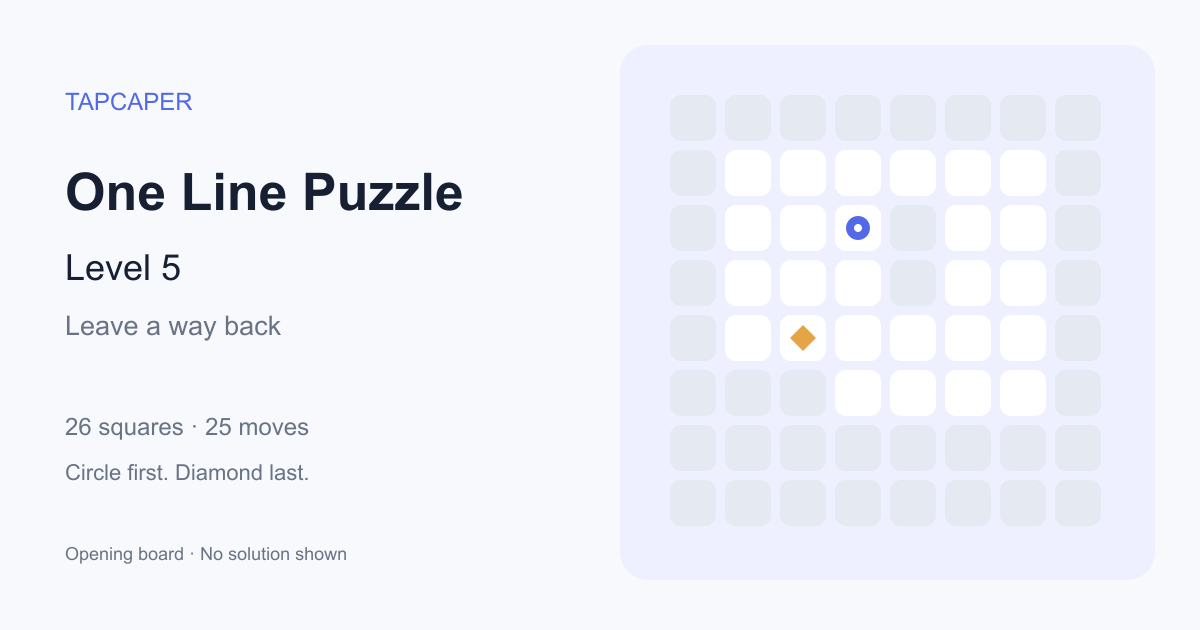
Begin at row 3, column 4 and finish at the diamond at row 5, column 3. The 26 active squares span 6 columns and 5 rows on an 8 × 8 canvas. The occupied area has 4 missing squares, including row 3, column 5 and row 4, column 5. The circle offers 3 legal forward openings; cover both sides of each connection before closing it.
- Canvas
- 8 × 8
- Active squares
- 26
- Verified route
- 25 moves
- Campaign band (estimate)
- Easy
- Round
- 1 of 7
A closer look at this board
The circle has 3 legal forward openings. There are 4 inactive squares inside the occupied rectangle; plan how to connect the areas around them. Filling an area too early can leave another area disconnected. A full path must cover every active square before the diamond.
Show a verified opening tip
One verified opening moves from the circle at row 3, column 4 to row 2, column 4. Keep the diamond at row 5, column 3 for the final move. Several first moves can work. Plan how you will return to the left side before using up the links above and below the gap.
Controls and recovery
Drag or tap neighboring squares; arrow keys also work. Retrace the immediately preceding square to undo, or press Backspace. Restart resets only this board's current route. No automatic warning appears while you can advance; a stationary stuck head gets a general nudge after about three seconds. Manual Hint provides up to 3 next-square hints per level. Rechecking a previously hinted route position is free; When device storage is available, Undo, Restart and refresh do not refill the allowance. If saving is blocked, used hints last only for this visit. General stuck reminders are free.
Questions about these puzzles
How many moves does this board need?
The verified route covers 26 distinct active squares in 25 forward moves. Backtracking changes your current route, and retries are unlimited. Other complete routes may also work.
Why can I not enter the diamond yet?
The diamond is the finish square. Every other active square must be covered before the final step into it. Reaching it early is rejected without changing the current route.